
Family and parent
How to scan a prescription and use Records
Take a photo of a medical paper and Pillbond's AI reads the medicines, tests and details for you. You check every line before anything is saved or rings, and the paper stays in Records.
Checked against the app on 12 November 2026 · 14 steps · 13 min read
Part of this guide may change soon. The Photos or Files choice and the pages-left line are tested on a computer, not yet on a phone. Deleting unsaved scans after 7 days is not switched on yet on the server. A Switch chip on the Records person card is planned, not built.
Walk through it
Step 1 of 14
Start a scan
Tap the raised Scan button in the middle of the bottom bar. If you look after more than one person, Pillbond first asks whose papers these are.
Steps
Step 1: Start a scan
Tap the raised Scan button in the middle of the bottom bar. If you look after more than one person, Pillbond first asks whose papers these are.
What the buttons do
- Scan (middle of the bottom bar): opens the scanner, on every screen.
- Whose papers are these?: tap the person the paper belongs to. Each person shows with their own photo.
- Records > Scan a paper: another way in, from a person's Records page.
- Parent page > Add medicine > Scan papers: another way in, from a parent's page.
Step 2: Take photos of the pages
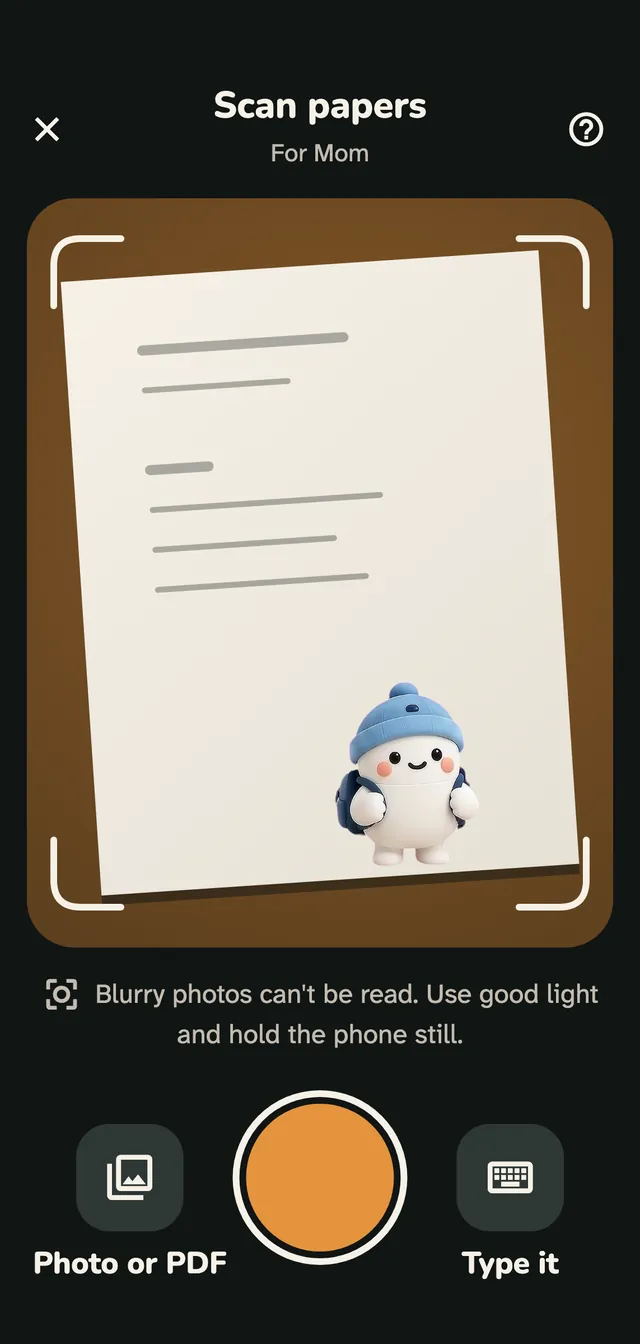
Tap the round shutter. Your phone's own document scanner opens and straightens each page. The pages then line up in a strip, and a Read button shows how many pages will be read.
What the buttons do
- Close: leaves the scanner.
- Help (?): opens How to scan, with three tips and pictures.
- Shutter (round button): opens the phone's document scanner. A screen reader hears “Scan pages” or “Scan more pages”.
- Photo or PDF: pick a photo or a PDF you already have.
- Type it: fill in the details by hand instead. Shown only before any page is taken.
- Read N pages: sends the pages to be read. Appears once you have at least one page.
Step 3: Or pick a photo or PDF you already have
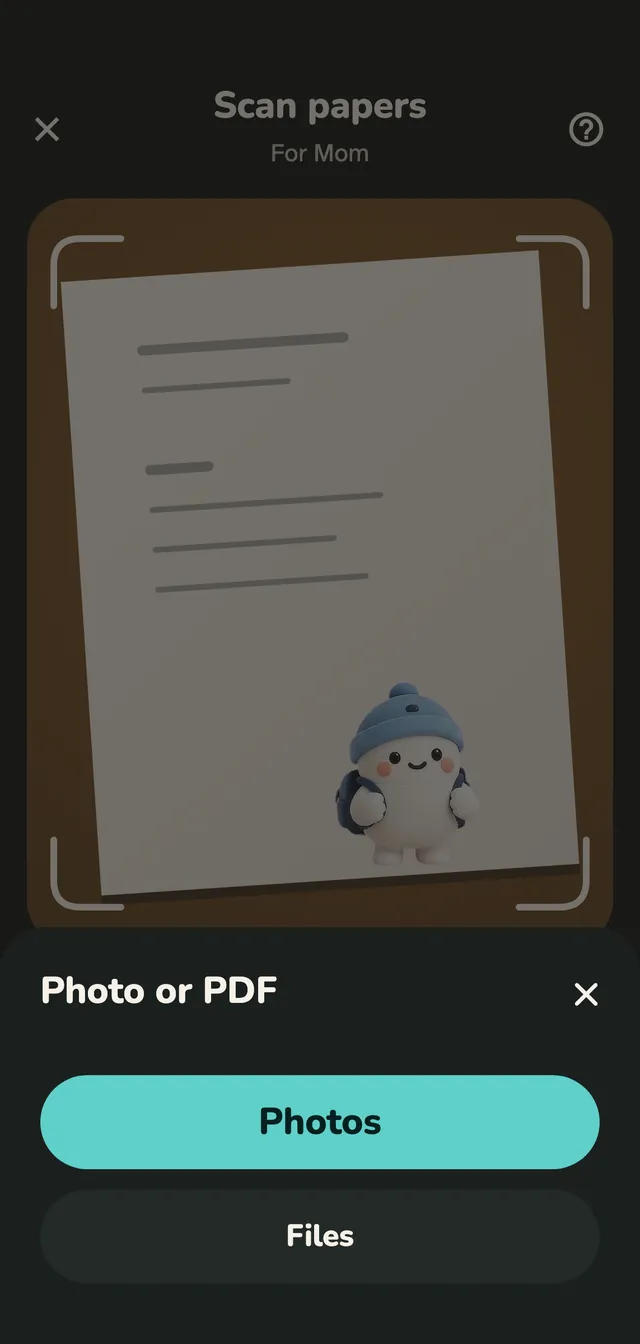
Tap Photo or PDF. A small sheet offers two places to pick from. Closing the sheet or the picker changes nothing.
What the buttons do
- Photos: opens your phone's photo library. You can pick several pictures at once.
- Files: opens the Files app, for a PDF or a picture kept there.
Step 4: Allow the AI to read the pages
The first time, Pillbond asks “Read the pages with AI?”. It explains that the pages go to an AI service to read the medicine names, that nothing is saved until you check it, and that the AI service keeps nothing.
What the buttons do
- Allow and read: sends the pages to be read.
- Not now: stops here. Nothing is read without your yes.
Step 5: Watch the AI read your paper
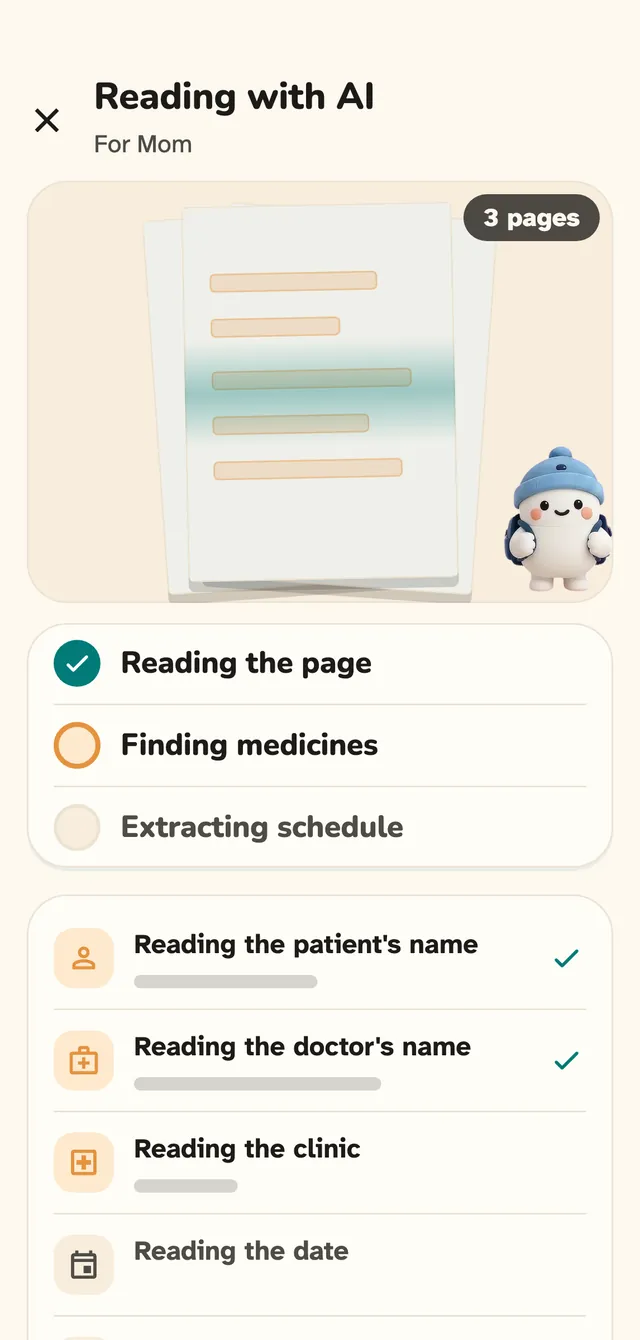
Your paper shows at the top with a scan line moving over it. Three steps tick in turn: Reading the page, Finding medicines and Reading the schedule. Below them, the patient, doctor, clinic, date, medicines and schedule fill in as they are read.
Step 6: If the paper can't be read
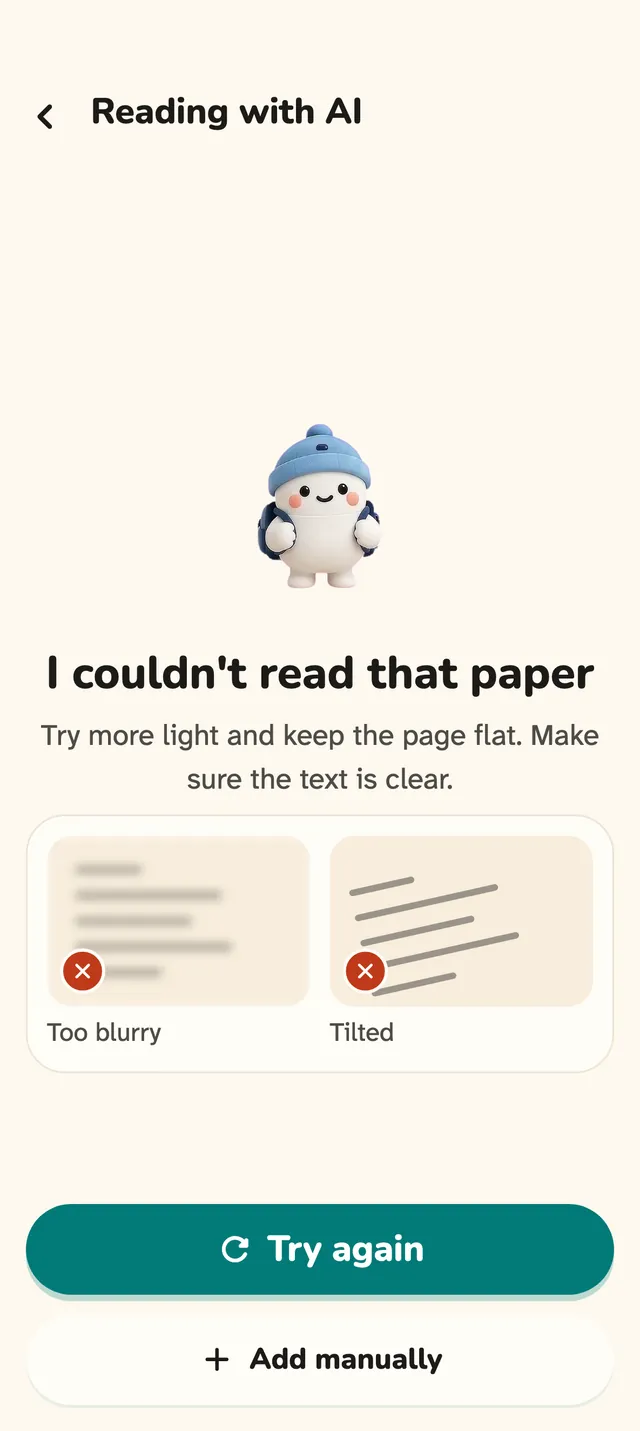
If the AI cannot read the paper, you see “I couldn't read that paper” with tips: more light, keep the page flat, make sure the text is clear. You can scan again or type the details in.
What the buttons do
- Scan again: goes back to the scanner.
- Type the details in: opens the form to fill in by hand.
- Try again: shown when the problem may pass, such as no connection. It reads the same pages again.
Step 7: Check what the AI read
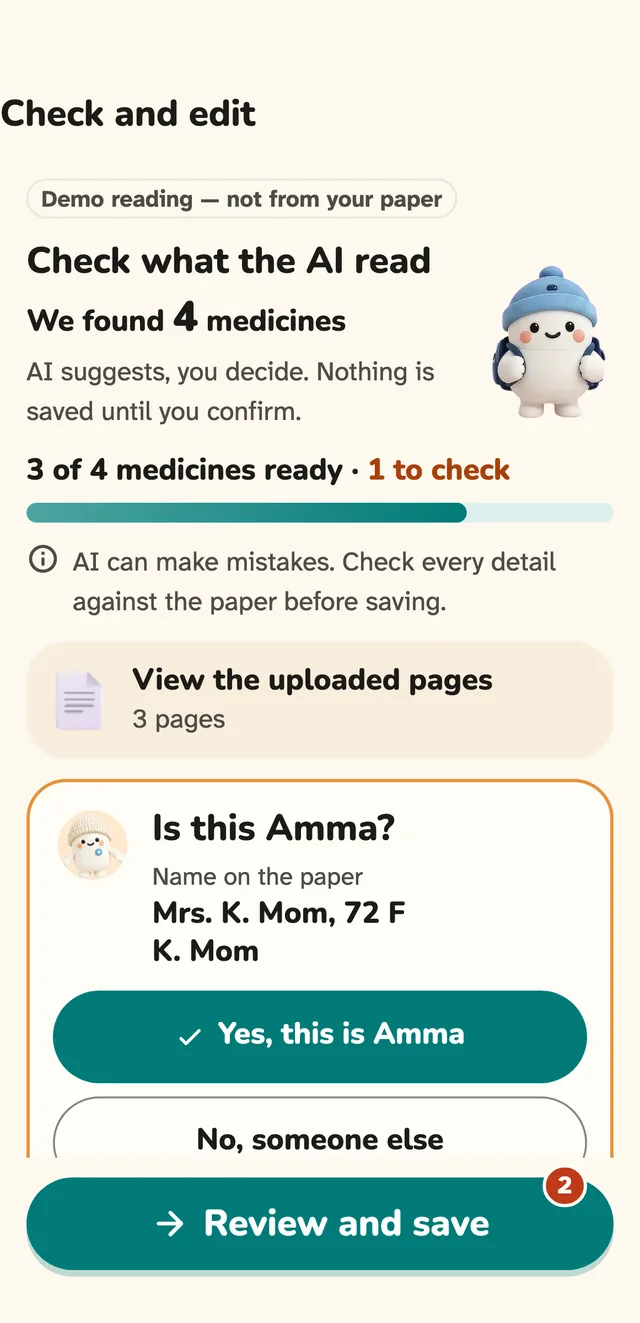
The check screen says “Check what the AI read” and “AI suggests, you decide.” Confirm the person, then go through each medicine card and each detail. You can change anything.
What the buttons do
- Is this (name)?: confirm the paper belongs to this person.
- Looks right: marks a medicine line as checked.
- Pencil: edit a medicine: name, strength, dose, times, food and days.
- ⋯ > Remove: takes a medicine off, with Undo.
- Add a missing medicine: adds a line the AI did not find.
- Values look right: confirms lab test values.
- Speaker (on Used for): reads the medicine name and the AI's short note aloud. Tap again to stop.
- Detected (type): change the kind of paper if it is wrong.
Step 8: Fix lines the AI was unsure about
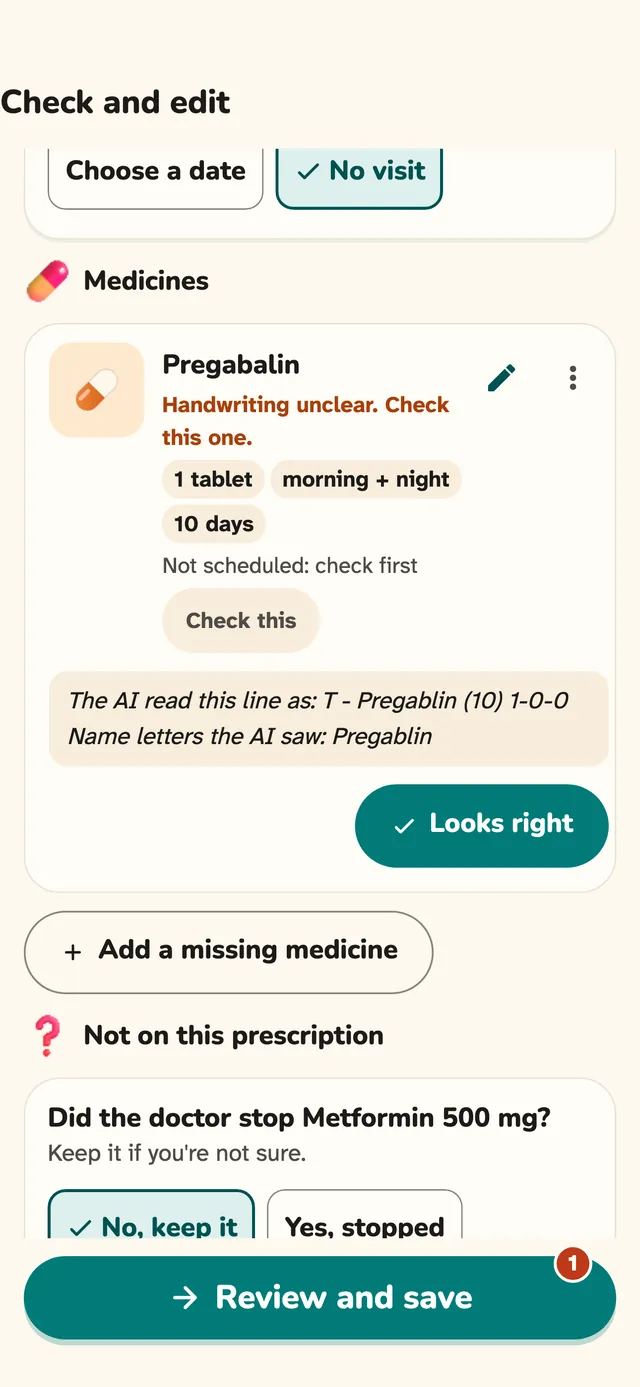
A line the AI was not sure of starts unchecked. On a handwritten paper every medicine line starts unchecked. Compare it with your paper and fix it, or tap Looks right if it is correct.
What the buttons do
- Looks right: confirms the name and turns the draft into a medicine to add.
- Pencil: type the correct name yourself.
Step 9: Add the date, stopped medicines and next visit
Every paper needs a real date. If the date is missing, the paper's card asks for it. Pillbond also lists current medicines that are not on the new prescription, and offers a next visit date if the paper has one.
What the buttons do
- Today / Yesterday / Choose a date: sets the paper's date. Only past dates can be chosen.
- No, keep it (default): the old medicine stays.
- Yes, stopped: marks the old medicine as stopped by the doctor.
- Save or Review and save: always at the bottom, with a red count of what is still needed.
Step 10: Review the new day and save
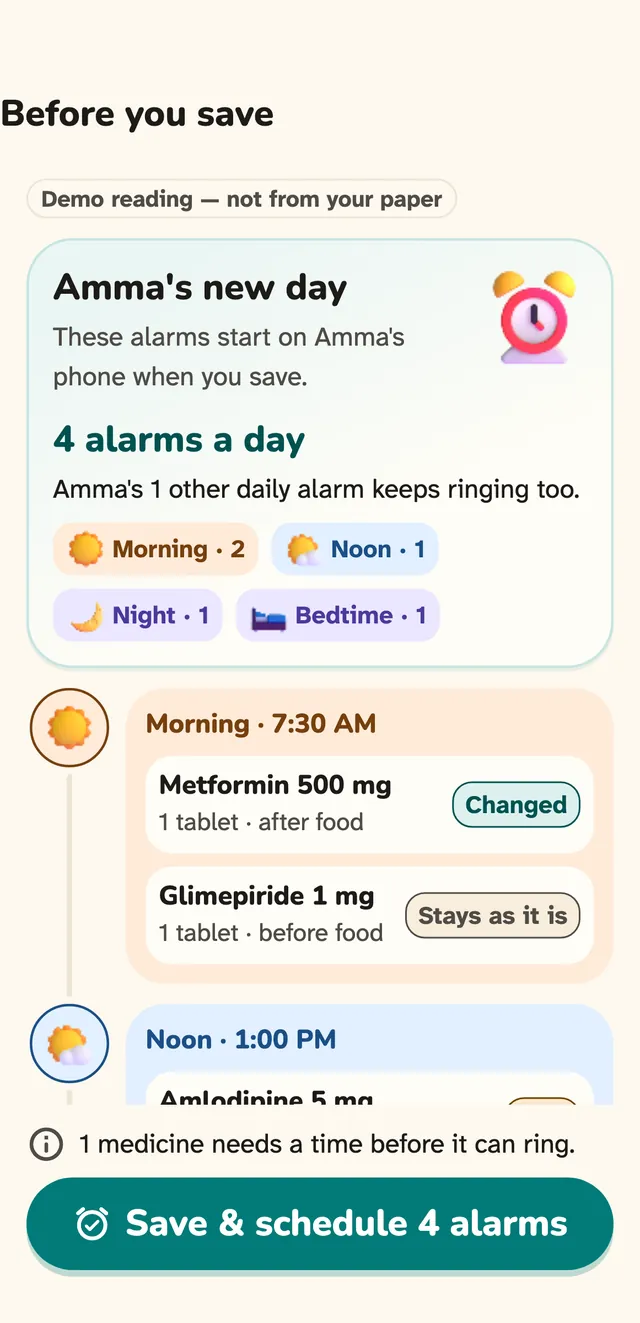
For a prescription, Pillbond shows the person's whole new day of alarms, marked New, Changed, No change, Stopped or Stays as it is, with Before and Now lines. Tap Save & schedule to finish.
What the buttons do
- Save & schedule N alarms: saves the paper and medicines and sets the alarms.
- Back to check: returns to the check screen.
- See (name)'s medicines: opens the medicine list after saving.
- Open Records: opens the saved paper's Records.
Step 11: Find papers in Records
Open the Records tab. Tap a person to see their papers. Their page shows four tiles with real counts and the latest paper.
What the buttons do
- Person row: opens that person's papers. Each row shows the number of records, prescriptions and the latest date.
- Scan a paper: starts a scan for this person.
- Prescriptions / Lab reports / Bills / Other: opens that kind of paper.
- Latest: opens the newest paper by its date.
- Search papers, tests, doctors: searches inside the tile you opened.
- Kind chips: filter by kind inside Other, with counts.
- Show all: clears the search when “No papers match”.
- Purchase bills: a row inside Bills.
Step 12: Open a paper
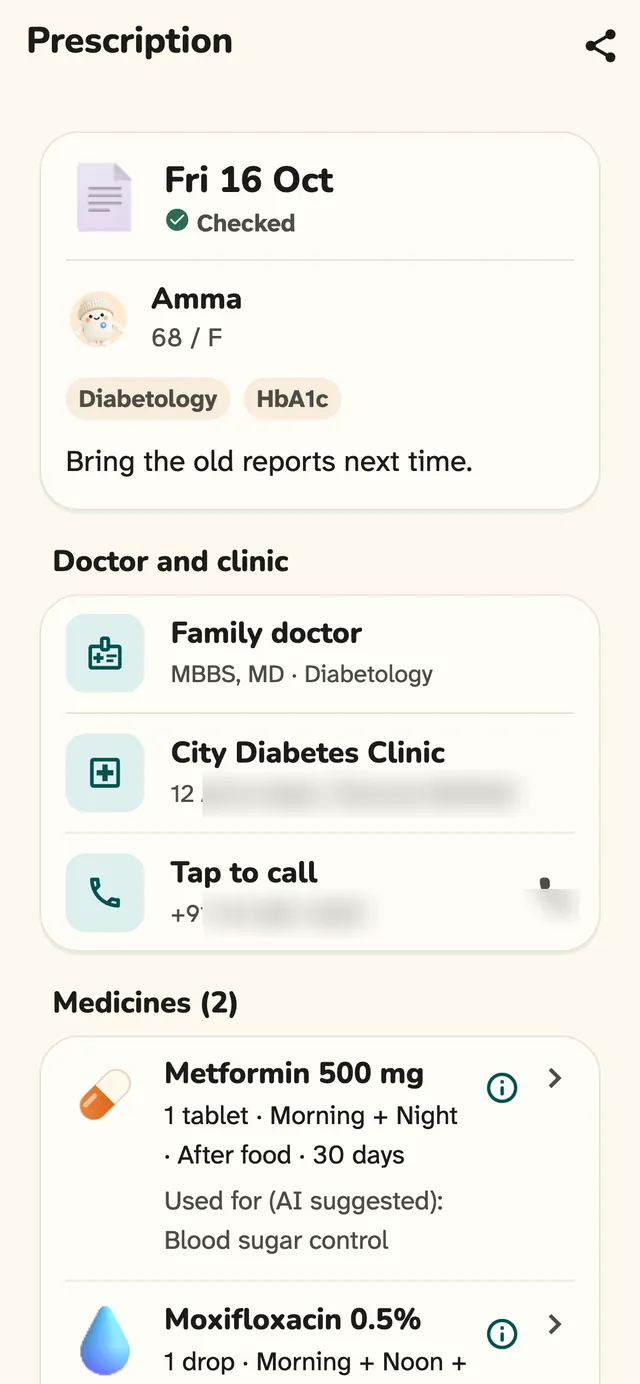
A paper's page shows only the sections it has: doctor and clinic, medicines, next visit, findings, test results, bill and the original pages. Pull down to refresh.
What the buttons do
- Share (top bar): shares the whole paper.
- Page tiles: tap a page to see it full size.
- Phone numbers: tap to call.
- Set times: shown on a medicine saved without alarm times.
- More: edit date and doctor, add a photo of the paper, add a medicine by hand, note a change the doctor made, see what changed, and delete this paper.
Step 13: Share a paper
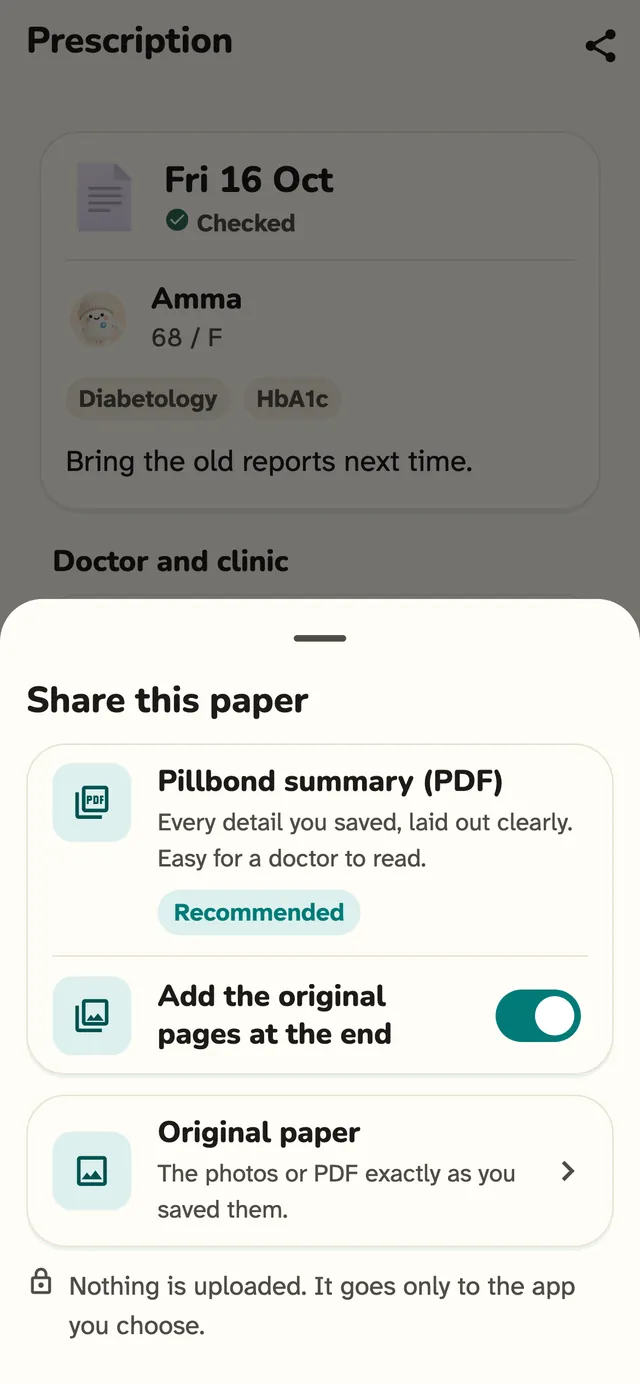
Tap Share at the top of the paper. Choose a neat Pillbond summary PDF or the original paper.
What the buttons do
- Pillbond summary (PDF): recommended. A clear one-file summary of the paper.
- Add the original pages at the end: on by default, adds the photos to the PDF.
- Original paper: shares the stored pages as they are.
- Share original: in the full-size view of one page, shares just that page.
Step 14: Delete a paper
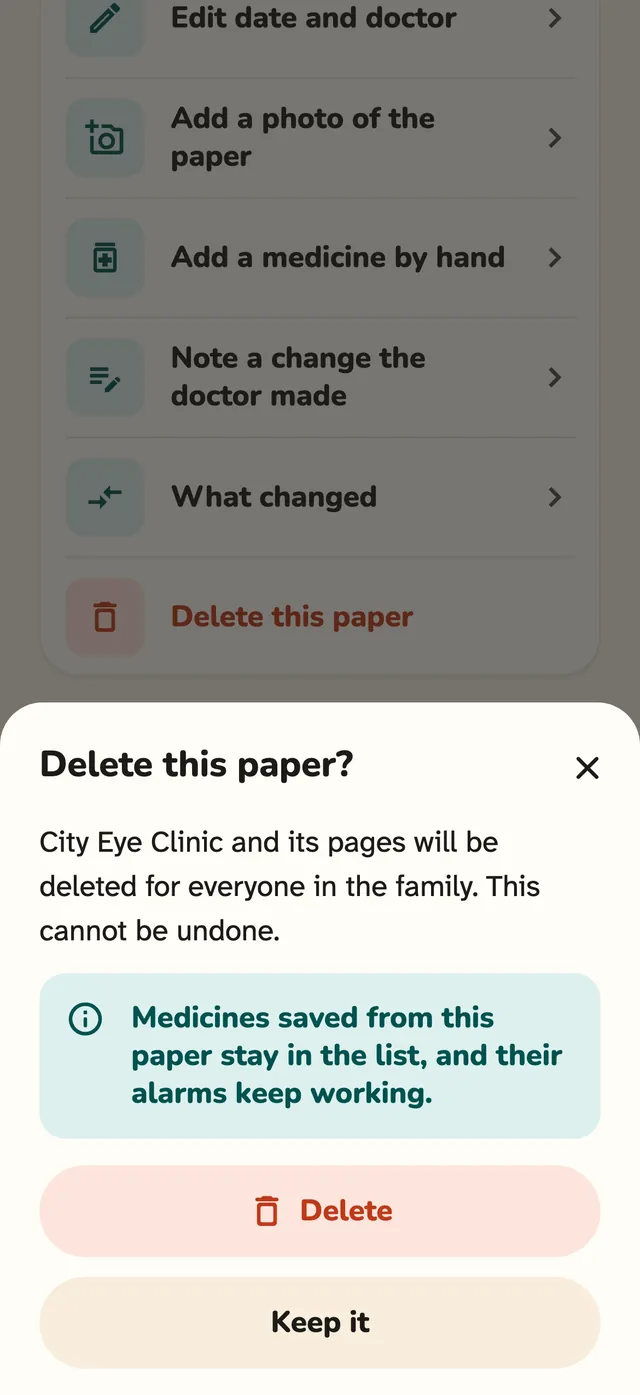
Open the paper and tap More > Delete this paper. Or, in a Records list, swipe the paper's card to the left to show a Delete button. Both ways ask you to confirm.
What the buttons do
- Swipe left on a card (right in Arabic): shows Delete. A swipe never deletes by itself.
- Tap the open card: closes it again.
- Delete: deletes the paper for good.
- Keep it: closes the sheet and keeps the paper.
Good to know
- Pages a month on a paid plan: 60 pages for each seat, shared across the family. A PDF counts each of its pages. The number renews each month.
- Only AI reading is limited. Alarms, answers, Records and typing the details in never use pages.
- Need more pages? sits next to Type the details in and opens the support contact.
- A scan can have up to 10 pages.
- AI suggests, you decide: nothing is saved and no alarm rings until you check it.
- If the AI reads a medicine name wrongly, the line stays a draft until you confirm or fix it.
- Papers are not counted in the care score or monthly report. Those count only the answers given when each alarm rang.
Questions about this
Is my paper kept by the AI service?
No. Pillbond asks before sending pages to the AI service, and the AI service keeps nothing. Photos lose their location data before they are sent, and nothing is saved until you check it.
The AI read a medicine name wrong. What do I do?
Compare the line with your paper. Tap the pencil and type the right name, or remove the line. Doubtful and handwritten lines start unchecked and are never saved until you confirm them.
Can I scan eye drops, creams or inhalers?
Yes. Every kind of medicine counts, not only tablets. If the paper says something like 4 times a day, pick up to three alarm times or save it without alarms.
If I delete a paper, do the medicines stop?
No. Medicines saved from the paper stay in the list and their alarms keep working. Only the paper, its pages and its read details are deleted.
Who can scan and delete papers?
The account owner, editors and the parent can scan. Only the owner and editors can delete (and a person using Pillbond for themselves, for their own papers). A viewer can do neither.
What happens when my pages run out?
Pillbond tells you the pages are used up and when they renew. You can always type the details in by hand.
More guides
- Parent and SelfHow to make Pillbond alarms ring on AndroidAllow the few phone settings that let the medicine alarm ring on time, full screen and out loud.
- Parent and SelfHow Pillbond alarms work on iPhoneAllow alarms and notifications on iPhone, test a reminder and know what iPhone allows and what it does not.